iOS UI SDK Quickstart Guide (Discontinued)
Note
Please note that we have announced end of sale for iOS UI SDK. It is no longer offered as a standard Webex Connect capability.
The Webex Connect conversation system comprises the set of components which makes it easy for developers to integrate a fully-featured chat experience within the application.
The details below outline the additional steps necessary to integrate the Conversation System of the Webex Connect SDK for iOS within a host application and assumes the use of the Xcode.
Prerequisites
Before proceeding further, you are required to integrate the Webex Connect Core SDK and Webex Connect Notification Service Extension for iOS within your application. If not done, please follow the Core Quickstart Guide to set up the Webex Connect Core SDK and Rich Notification Support to set up the Webex Connect Notification Service Extension for iOS.
The Conversation System requires the Core SDK and Notification Service Extension to be correctly configured before the system will function.
Project Setup
This section provides the steps necessary for adding and configuring the Webex Connect UI SDK within your XCode project.
- From the Webex Connect Portal menu, go to Tools > Downloads to download the iOS UI SDK.
- Unzip the SDK and drag-drop the
IMIconnectUISDK.xcframeworkfile into your XCode project. - Select Create groups and Copy if needed in the prompt that appears.
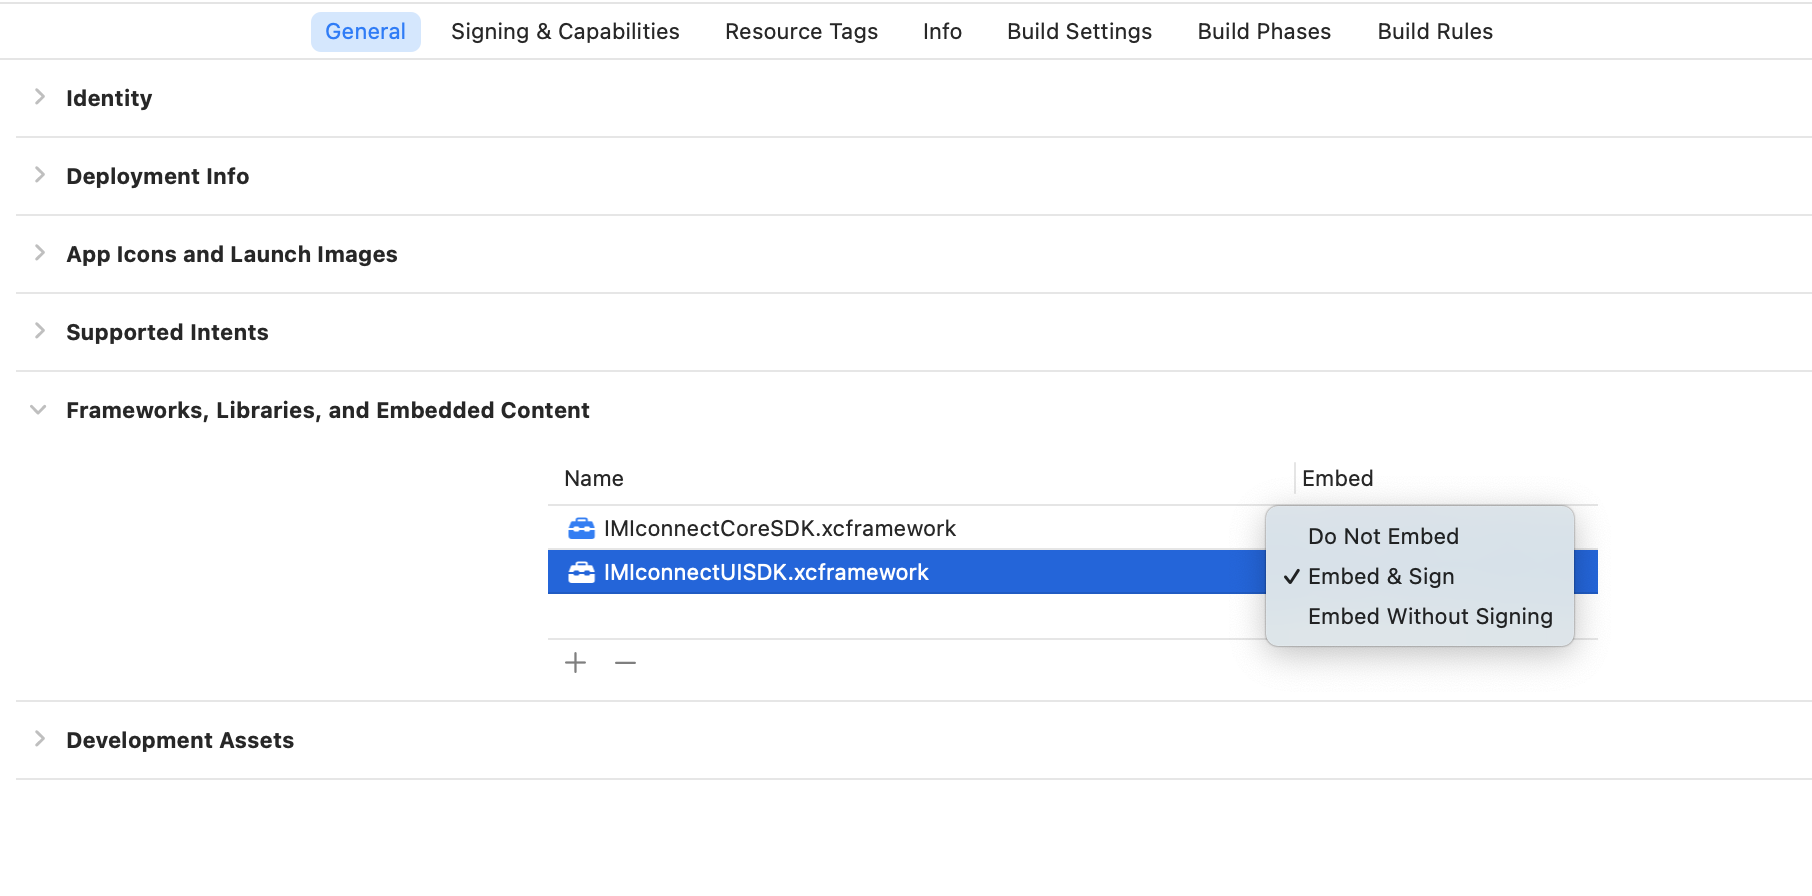
- Select your project within the navigator. Click the General tab and go to the Frameworks section and change Embed status to Embed & Sign for IMIconnectUISDK.xcframework.

Downloading UI SDK
You can download the UI SDK framework from the Webex Connect tenant.
Go to Tools --> Download SDKs --> UI SDK
Implementation
Configure a Message Store
The Conversation System UI components require that a valid message store has been configured prior to the components being used. The Core SDK provides default implementations that may be used out of the box.
The following code creates an ICDefaultMessageStore instance and passes it to ICMessaging to enable message store functionality. You should place this code within your AppDelegate didFinishLaunchingWithOptions: method immediately after the IMIconnect.startup method call.
`[ICMessaging shared].messageStore = [[ICDefaultMessageStore alloc] initWithPassword:@"Your Password"];
Configure Categories
Categories define the contact points within your organization and allow you to segregate conversations within the platform. Categories are presented to the user as a list and selection of a category is required to start a new conversation. For example, imagine you wish to allow the user to contact a number of different departments, each of these departments would be represented by a category.
You configure categories by creating instances of the ICConversationCategory class like so:
ICConversationCategory *category = [[ICConversationCategory alloc] initWithTitle:@"Sales" streamName:@"sales"]];
A valid list of categories is required in order to launch the ICConversationViewController within the next section.
Launch the Conversations View Using Storyboard Reference
The ICConversationSplitViewController can be launched via segue by using a Storyboard Reference:

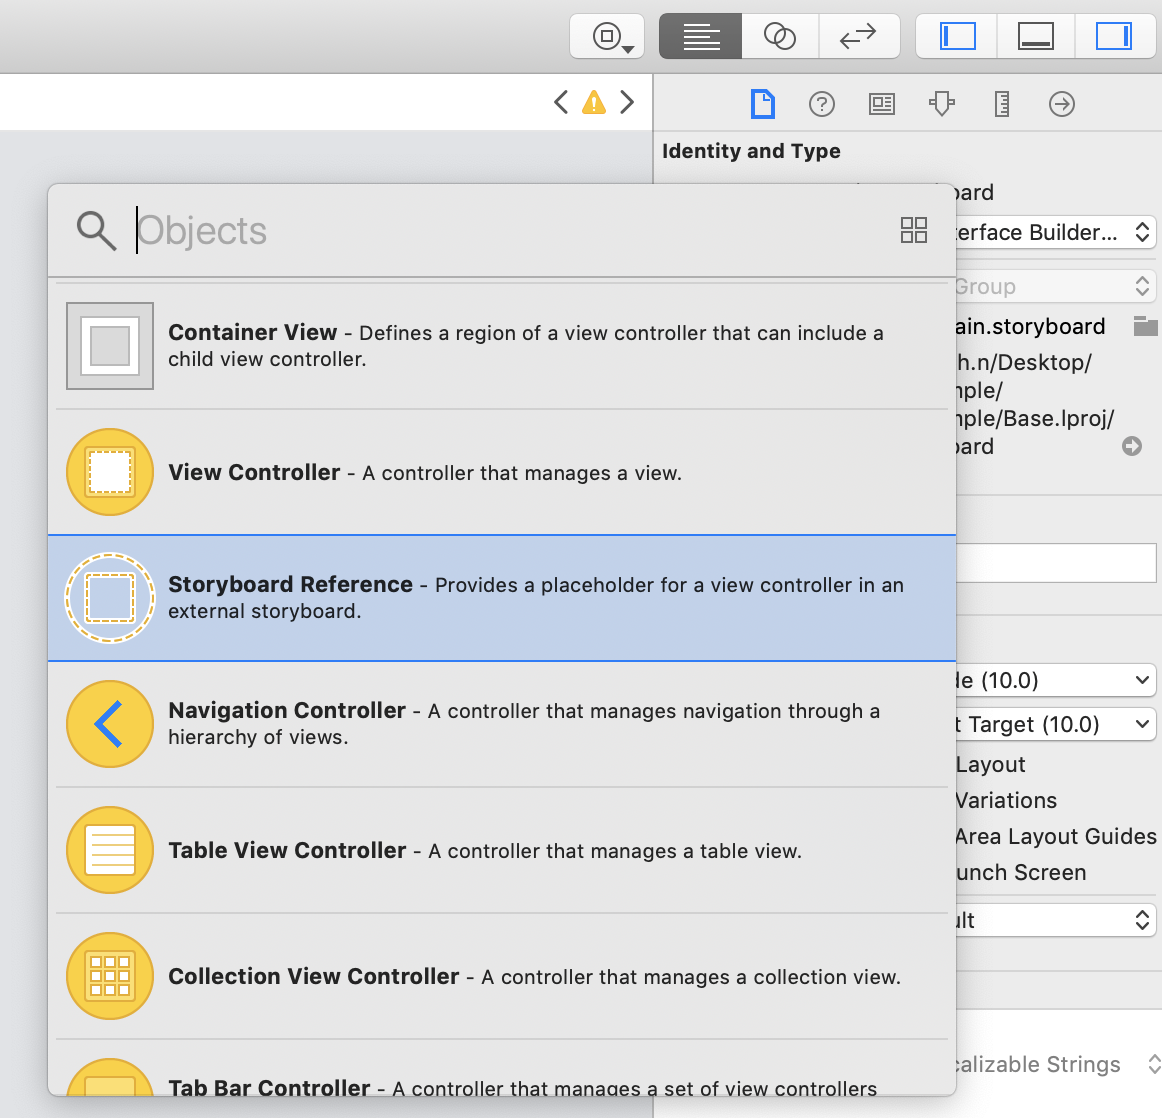
- Drag and drop the storyboard reference in your Main storyboard.
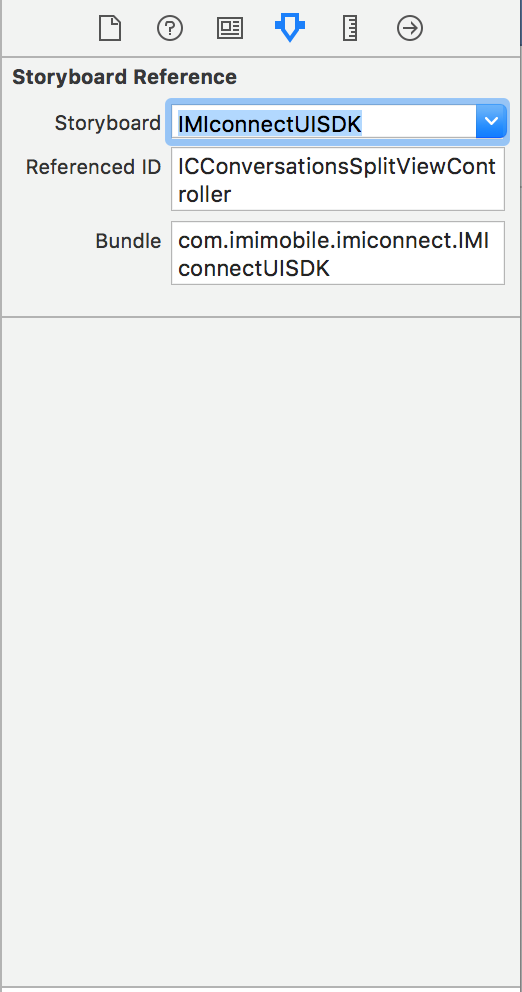
- Select the Storyboard Reference and go to the fourth tab Show the attribute inspector.
- In the Storyboard text field, enter
IMIconnectUISDK - In the Referenced ID text field, enter
ICConversationsSplitViewController - In the Bundle text field, enter
com.imimobile.imiconnect.IMIconnectUISDK

The ICConversationsSplitViewController requires a list of ICConversationCategory instances, to provide the list when launching from a seque, implement the prepareForSeque method like so:
- (void)prepareForSegue:(UIStoryboardSegue *)segue sender:(id)sender
{
  ICConversationSplitViewController *conversationSplitController = (ICConversationSplitViewController *)segue.destinationViewController;

  NSMutableArray *categories = [NSMutableArray new];

  [categories addObject:[[ICConversationCategory alloc] initWithTitle:@"Sales" streamName:@"sales"]];
  [categories addObject:[[ICConversationCategory alloc] initWithTitle:@"Technical support" streamName:@"techsupport"]];

  conversationSplitController.categories = categories;
}
Launch the Conversations View Programmatically
To launch the ICConversationsSplitViewController from code, use the following snippet:
UIStoryboard *uiSDKStoryboard = [UIStoryboard storyboardWithName:@"IMIconnectUISDK" bundle:[NSBundle bundleWithIdentifier:@"com.imimobile.imiconnect.IMIconnectUISDK"]];

ICConversationSplitViewController *conversationSplitController = [uiSDKStoryboard instantiateViewControllerWithIdentifier:@"ICConversationsSplitViewController"];

//The controller requires a valid list of ICConversationCategory instances
NSMutableArray *categories = [NSMutableArray new];

[categories addObject:[[ICConversationCategory alloc] initWithTitle:@"Sales" streamName:@"sales"]];
[categories addObject:[[ICConversationCategory alloc] initWithTitle:@"Technical support" streamName:@"techsupport"]];

conversationSplitController.categories = categories;
Message Synchronization (optional)
To provide the best possible user experience the Core SDK provides synchronization of messages across devices. This is useful to obtain message history when a user installs your application to a new device.
Message synchronization is managed by the Core SDK but will only function when a message store has been set and a valid synchronization policy has been provided.
Configure Synchronization Policy
The ICMessageSynchronizationPolicy class allows you to configure various options which limit how much data is synchronized, for the purpose of this guide we will enable full synchronization.
The following code snippet enables synchronization of the full user message history:
ICMessageSynchronizationPolicy *policy = [ICMessageSynchronizationPolicy new];

policy.mode = ICMessageSynchronizationModeFull;

[ICMessageSynchronizer setPolicy:policy];
Updated 5 months ago
